Winter Saison?

It’s been awhile since I’ve brewed, and that is definitely an itch that needs to be scratched soon.  Truthfully, my whole brew schedule for the last several months has been out of whack.  While homeownership has opened up some new possibilities to me as a homebrewer, it has also presented a lot of distractions from brewing – the latest of which is to repaint and organize the basement (well worth the time and effort, as the end result will be the basement looking more like a brewery/bar/lounge area, and less like a cluttered dungeon).

The point is that I have a few beers that I have been planning to brew since the Summer and they just keep get pushed back due to time being spent elsewhere.  As a result, the set of Saisons I wanted to get brewed during the Summer (the traditional time to brew and drink saisons), are now finally working their way into rotation.  Sure, I won’t be able to let the yeast fly up into higher temperatures like a lot of people like to do, but I want a damn saison to drink, so to hell with typical brewing schedules.  Besides, one of the luxuries of homebrewering over commercial brewing is that it’s no big deal if you miss the proper season for a release.  In all seriousness, I’m actually interested to see how the yeast (the newer Belle dry yeast saison strain) does at lower temperatures, and the more subdued yeast character will likely play well to the first couple brews in the set (I’ll probably use the same cake for two or three brews).

So here is the plan for the first one.  No deep story behind this brew, just a concept.  I’ve had this idea to do a honey themed brew as a saison – not just with honey in the recipe (although that is part of it), but also some honey and raisin character from the malt.  That means honey malt and Special B get the tap for this one.  To take the honey them a little further, half the batch will get a nice nap on top of mead (homebrewed) soaked oak chips.  This is one of those beers where it could be delicious, but could also be a big ole swing-and-a-miss.  Certainly not in my wheelhouse, but what’s the fun if you don’t push your boundaries and learn new combinations of ingredients?  There aren’t any new ingredients in this brew for me, but I haven’t used about half of them very much at all, and certainly not all of them in one brew.  Should be interesting.  Stay frosty and brew on, good people.

If you’re eyeballs want to soak up the recipe, here it is:

Honey Saison

Recipe specifics:

Style: Saison
Batch size: 5.2 gal
Boil volume: 6.2 gal
OG: 1.069
FG: 1.017
Bitterness (IBU): 38.1
Color (SRM): 15.1
ABV: 6.8%

Grain/Sugars:

4.00 lb Wheat (Belgian), 31.6%
3.15 lb Pilsener LME, 24.9%
3.00 lb Pilsener (Belgian), 23.7%
1.00 lb Honey, 7.9%
1.00 lb Honey Malt (Canadian), 7.9%
0.50 lb Special “B” (Belgian), 4.0%

Hops:

0.50 oz Galena (AA 11.0%, Pellet) 60 min, 16.8 IBU
1.00 oz Calypso (AA 12.0%, Pellet) 15 min, 18.2 IBU
1.00 oz Calypso (AA 12.0%, Pellet) 2 min, 3.1 IBU

Yeast/Misc:

Belle Saison Yeast, 1.0 unit(s), Yeast
Irish Moss, 1.0 unit(s), Fining 1 tsp at 15 min


Song of the Day: “Taylor” by Jack Johnson

Beer of the Day:  Homebrewed Lee’s Mild Clone

Soundtrack to a Brewday: “Disarm the Descent” by Killswitch Engage

Yeah, so it’s been awhile.  For a multitude of reasons, this blog fell by the wayside the last several months, but I’m trying to get back into the swing of things.  In the spirit of trying to fire things up again, I’m introducing a new series of posts that I will bust out periodically.  I’m calling it Soundtrack to a Brewday.

In these posts, I will discuss an album (new or old) that I’ve been digging lately and suggest beers that would be good to pair with the album, either for brewing or for drinking.  What do half-assed album reviews have to do with homebrewing, you ask?  Well, like many aspects of my life, music is a big influence on my brewing (and I doubt I’m alone).  Sometimes it’s an explicit influence, as in the cases where I have designed beers around specific songs by my favorite musicians, and sometimes it’s a more subliminal expression of the impact that music has on my personality, that comes through in my brewing.  I want this blog to not only be about the process, ingredients, and tools of brewing, but also about the culture and philosophy of brewing and what brewing means to me.  And, well, music culture and beer culture seem to get along just like peas and carrots.

Enough of that.  What’s the first album I will feature, you ask (assuming you haven’t read the title of this blog)?  “Disarm the Descent” by Killswitch Engage.  2013 saw the first album released featuring the newly-returned lead singer Jesse Leach, since their hit album, “Alive or Just Breathing”.  And with his return came a new tone and energy than their last several releases.  Lots of blast beasts, less of the melodic vocals that the band featured with their previous vocalist Howard Jones.  To me the album seemed to be along the lines of “Alive or Just Breathing” with a more mature and refined musical backbone as a result of years of experience for all the members of the band since that release.

Contextually, the album deals a lot with coping with stressful times, anxiety, and depression – sounds really uplifting doesn’t it?  Actually, it is.  The album definitely maintains a very positive attitude, as Killswitch generally seems to key in on, focusing on the idea that there is a light at the end of the tunnel, no matter how tough things get.  This is a great album for everyday listening, and I could also see it being an incredible album to get you through tough times.

The album certainly has a different feel to it with the return of Jesse Leach.  Now, I’m not going to get into picking which vocalist was better – both Jesse Leach and Howard Jones are great vocalists in their own right, just with different styles.  Does it impact the tone of Killswitch Engage?  Sure.  Does it change who they are as a band?  Not really.  The album still sounds like Killswitch – maybe closer to old school Killswitch, rather than the last couple albums from them, but still definitively Killswitch.  I welcome the new energy that Jesse has helped inject in the band.  In my opinion, it resulted in their best album since “The End of Heartache” back in 2004.

“Disarm the Descent” is great album to rock out to while brewing or just knocking back a couple brews.  Whether you just want something to wake you up proper for those morning brew sessions, or whether you want an album with a backbone to put on while having a couple pints with your buds, any metalhead brewer will not be disappointed.


Album: “Disarm the Descent”

Artist: Killswitch Engage

Favorite Track: “In Due Time”

Suggested Beer Pairing (Brewing or Drinking): Something American, assertive, moody, and perhaps dark.  A brew along the lines of a black/brown IPA with a decent malt backbone and a punchy hop presence (stick with the raw, resiny, American hops, and save your citrus bombs and subtle European hops for another day and another album) would be a good choice.  If you really want to be patient, I will probably be doing a Killswitch Engage brew as part of my Liquid Music homebrew series at some point in the next year or so, and the recipe will be posted on this blog.


Song of the Day: “In Due Time” by Killswitch Engage

Beer of the Day: Stone Sublimely Self Righteous

Tools of the Hobby: Beer Recipe Design

There are lots of tools and methods out there for designing homebrew recipes.  Varying from  very simplistic to crazy detailed, every brewer has their favorite go-to methods, depending on their brewing style.  Here are a few of my favorites.

BrewR Android App

I love being able to write recipes on-the-go.  I’ve used a few different apps since I started using smartphones, and the one that I have stuck with is BrewR.  I highly recommend this app for any homebrewer, especially for brewers just getting into recipe writing.

One of my favorite things about this app is its simplicity.  It certainly isn’t as robust as programs like BeerSmith, but it does the job perfectly for what it is designed for – recipe writing on-the-go. It doesn’t have strike water calculations, equipment profiles, or mash profiles, but it does have a very easy to use interface, easy to adjust recipe settings (i.e. batch size, specifications for extract, all-grain, or partial mash on each recipe, etc.), a flexible and expandable ingredients database, a cloud sync feature (which was a lifesaver when my last phone bit the dust), and flexible sharing features.  Really the only downfalls are that it is not as robust in the equipment and mash profile department, and that it is not in BeerXML file format.

This is app is a no-brainer for any extract and partial-mash brewer and for any brewer getting into writing their own recipes.  Even for all you all-grain brewers out there, this is a great app to have in your tool box for writing on-the-go.  Trust me, you won’t mind forming up the recipe in this app, even if you have to re-enter it in another tool for the final version, because the interface is so smooth and easy to use.  Even as I move into more all-grain batches now that I have an outdoor brew rig, I still plan on using this app for writing on-the-go rough drafts.

A sample of my Phantasm imperial oatmeal stout, recipe designed using BrewR.

A sample of my Phantasm imperial oatmeal stout, recipe designed using BrewR.

BeerSmith

It’s probably no shocker to see BeerSmith on any brewer’s list of favorite tools.  One of the most popular brewing software packages, BeerSmith has a lot going for it.  It uses the BeerXML file format standard, has customization for mash and equipment profiles, has a customizable ingredients database, has a variety printing and reporting options, allows for easy exporting, and even allows for inventory tracking for ingredients.  As one of the most popular tools, it also means that there are plenty of great recipes and ingredient databases out there from other brewers that can be easily imported.  The program even has recently released mobile companion apps that make it easy for synchronizing to a pocket-sized platform, or for convenient viewing on a tablet for easy reference on brew day.

The only downfall of the program is its enormous strength.  For a lot of brewers BeerSmith is a little overkill, particularly for extract brewers just starting out.  I got my copy of BeerSmith a few years ago and found myself not using it a whole lot because I was mostly doing extract and partial-mash recipes and didn’t find myself in front of a computer when I wanted to write a recipe.  Now that I do more all-grain, I will start using BeerSmith a bit more for fine-tuning recipes and dialing-in mash calculations.

Pen and Paper

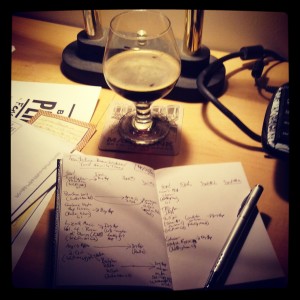
As much as I love the power of brewing recipe software packages and apps, having good ol’ pen and paper around is invaluable as far as I’m concerned.  I actually keep two sets of books (insert book-cooking joke here) – one that I write down the final recipes and batch statistics for every batch I brew, and one that I use for brainstorming and writing down new concepts and ideas I want to try (because if I don’t write that stuff down, I forget half of it).

The obvious drawback of pen and paper is that none of the calculations are done automatically for you.  That’s why I suggest using pen and paper as a supplement to a computer- or mobile-device-based tool.  The benefits of pen and paper are pretty numerous – no worrying about dead batteries, no worrying about a hard drive dying, no worrying about ruining an expensive phone/tablet/laptop around the multitude of hard objects and containers of liquid on brew day, and it is very flexible for note-taking and formatting.  Sometimes, high-tech is not the best answer.

Pen and paper - always classy (even if chicken scratch is more legible than your hand writing).

Pen and paper – always classy (even if chicken scratch is more legible than your hand writing).

I recommend using a combination of a couple of tools when writing recipes and keeping a log of recipes you have done in the past.  Keep a set of the recipes in electronic format as your working copies since this is probably the format you are using to calculate your recipes out, but keep a hard copy of the recipes too.  Whether you are recording your recipes by copying them down with pen and paper, or printing your recipes out from your computer, it’s always to have a hard copy of your recipes.  Hard copy redundancy is your friend if your hard drive or phone bite it.

That’s all I got for you today, so go forth and brew!

Song of the Day: “Mother and Child Reunion” by Paul Simon

Beer of the Day: Free Will Citra Pale Ale

Building a Compost Barrel

While not directly related to either brewing or cooking, I figured I would do a post on this, as it does have a couple of integration points with brewing.  Back in the May/June issue of Zymurgy, there was an article called “New Life for Spent Grains”.  I find this to be one of the articles of Zymurgy that I reference most.  The idea of the article is that there are a lot of uses for those tasty grains that get dumped out of mash tuns and grain bags after a brew day.  The article gives a few great uses for the grains after a brew day – compost for your garden, a dog treat recipe, a pizza crust recipe, and a cinnamon bun recipe.  Today’s post will put a spotlight on the compost idea, but I have made the dog treat recipe and the pizza crust recipe several times and they both work great (I will do another post or two on those down the line).

Building a compost barrel is a great way to use up materials that you would probably be getting rid of anyway, and turning them into natural fertilizer for your garden.  In my case, I plan on using spent grains (among other things) in the compost and using the compost on my vegetable garden and my hops.  Which turns a by-product of a brew day into something useful that you can use for growing hops, or whatever else you’re growing in your backyards.

The build design that the article describes is pretty simple.  Basically all you have to do is take a trash can, drill some holes in the lid and the bottom of the can to allow venting (the article recommends 1/2″ holes 6″ apart), and bam – you have a compost barrel.  They recommend layering it with one layer carbon-rich material (i.e. shredded cardboard, newspaper, etc.), one layer nitrogen-rich material (i.e. spent grains, grass clippings, vegetable and fruit scraps, etc.), and one more layer of carbon-rich material.  You then basically keep the top moist (but not soaking) and stir it up periodically to keep it warm so that it continues decomposing.  You can continue to add layers as the size of your container allows.  You know it is ready to use when you don’t recognize what the ingredients used to be (i.e. the cardboard shreds, don’t look like cardboard anymore).  Just spread it on your garden, hops, flowers, etc. to give them a rich dose of nutrients.

This slideshow requires JavaScript.

My build followed the article fairly closely, but here are a few notes on what I did:

  • I was able to get my hands on a used 55-gallon drum for free (thanks Harry!), so I used that by cutting the top off to use as a lid.  This saved me a little money since I didn’t have to buy a plastic trashcan, and it gave me a nice big capacity.  Since the top had to be sawed off to create the lid, I also added on an inexpensive hinge to attach the lid and make it easy to open.  That being said, picking up a plastic outdoor trashcan at the hardware store, will do the trick just fine.
  • The article suggests drilling 1/2″ holes, 6″ apart in the top and bottom of the container for proper ventilation and drainage.  I did not have a drill bit that big so I used my biggest bit and drilled more holes than suggested.  I also drilled some holes in the sides of the barrel, mainly for drainage.  The point is, make sure you’re allowing enough ventilation.  When organic material decomposes, it generates a fair amount of heat and lets off some gases that you definitely do not want building up in a sealed container – so drill those holes, folks.  You need the lid to hold in some heat to keep the decomposition process going, but you want to let those gases out and you also want some drainage.  You want the mixture to stay moist, but not soaking wet.
  • I did this build over this past weekend and started mine with shredded cardboard and grass clippings, because that’s what was easy for me (I just moved into a house so I have a ton of cardboard lying around that I need to get rid of and my lawn mower has a bagger on it so it was easy to dump a bag of grass clippings in).  I also have been tossing garden trimmings and fruit and veggie scraps in, and plan to dump in some spent grains after my next brew day.  Make sure to keep the top moist and to stir up the barrel once in a while to make sure it stays warm.  If the compost barrel starts to get too stinky, it means you need to add more carbon-rich material.

I just did the build and started up the barrel this past weekend so it will be awhile before I will be able to use the contents, but I am definitely excited to have some natural fertilizer for the hops and the veggies.  I’m hoping to have some compost ready to at least spread on the hops later in the season when the bulk of the hop cones will be forming (although it looks like I will be getting a small, early harvest from one of my Cascade crowns and another late season harvest like the same plant did last year, so I won’t be able to use the compost to boost the early harvest).  However, even if it isn’t ready by then, I plan on spreading the compost over the veggie garden and the hops either at the end of the season or at the beginning of the growing season next Spring to mix in the compost to give all my plants a nice boost.  If it works out well, I may even add in a second barrel.  This really is an experiment for me so I am excited to see how long it will take before I get results, and I will be sure to keep you all updated as the compost progresses.

Until next time, cheers!

Song of the Day: “The General” by Dispatch (the live version off of their live album “Ain’t No Trip to Cleveland”)

Beer of the Day: Southern Tier’s Plum Noir

Tools of the Hobby: Ode to My Grill

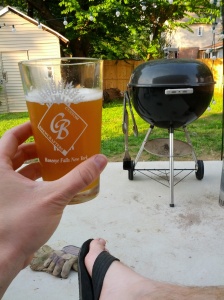
Without a doubt, my favorite piece of kit in my cooking arsenal (outside or in) is my Weber Kettle Grill (One-Touch Silver 22.5″ Kettle Grill).  This thing is a work horse.  I probably average cooking on this grill about twice a week in the Spring and Summer, and I’ll even bust it out once in a while when its cold.  Add on a grill cover or a tarp and these things hold up remarkably well. 

grill

Whether its brewing or cooking, I tend to favor methods and tools that are simple and straight forward.  This grill certainly fits the bill.  I pair the grill with a basic charcoal chimney to start up the coals.  No need to mess around with lighter fluid.  No worrying about running out of propane or messing around with burners.  Temperature control is slightly less straight forward than a gas grill but that’s where the art of grilling comes in.  After cooking on a grill like this a couple of times, you learn how to dial in the temperature pretty well by using the vents. 

Now I’m not saying that gas grills are bad; I simply prefer charcoals.  Gas is certainly easier to control, a little quicker to start up, and easier to keep temperature over a long period of time (i.e. for a barbecue when you have to do several batches of food over an extended period of time).  But charcoal has better flavor, keeps you in touch with the process better, is very easy to take apart and clean, and grants a bit more flexibility in using methods such as indirect cooking (the larger kettle grills give the ability to be able to pile all the coals on one side and cook on the other side to slow cook) and putting wood chips on top of the coals for extra flavoring. 

The 22.5″ size is plenty large enough to cook a full meal for a few people, and large enough to do hamburgers and hot dogs for 10 people in one batch.  This grill (or a similar grill from other brands – although I do trust Weber products more than some other brands) is a great value for the cooking power and flexibility it gives.  I plan on keeping one of these grills in my arsenal for the rest of my days, and would recommend it to anyone interested in grilling.  Short on space?  Looking for a good camping grill?  Pick up a Weber Smokey Joe – they are great little small charcoal grill.


Song of the Day: “Worlds Apart” by Times of Grace

Beer of the Day: Stone Imperial Russian Stout

Chop & Brew – Episode 06: Growing Hops at Home (Part 1)

Here’s a pretty awesome look at the early season for growing hops at home, and what goes into planting and setting up hops for growing at home from Chop & Brew. While you’re there, do yourself a favor, and go ahead and click that Follow button – you won’t regret it. If you’re a Brewing TV disciple you may see some familiar faces. Chip has the workings of a pretty sweet homebrewing and cooking video blog going over there.

Chop & Brew

Another spring, another hop crop gets underway. In this episode of Chop & Brew, we look at the basic steps to planting hop rhizomes in containers and in the yard. Ted and Paul help new hop-growers with tip and techniques for the start of the growing season. Chop & Brew will do several episodes over the coming months on maintenance, harvesting, drying and of course a fresh-hop brew day episode. [Original postdate: May 19, 2013]

Related Links:
C&B Downloadable version of Episode 06 on Vimeo & Tip Jar
Chop & Brew Lagniappe: Cooking Hop Shoots (Hop Asparagus)
Niko Brew – hop rhizomes, hop pellets and more
Homebrewing 311: Growing Hops at Home DVD (Northern Brewer)
Ted’s Hops Project HomeBrewTalk Thread
Paul’s Hops Project HomeBrewTalk Thread
Chris Colby on Container Hops (BYO)
Warning About Dogs & Hops (Northern Brewer Blog)
Brewing TV Hop Madness Episodes (shot and edited by Chip Walton)…

View original post 6 more words

Hop Yard 2013 Update: Early Spring

As a homebrewer with a green thumb, it was a pretty natural extension for me to grow hops.  I’m now in my second year of growing hops, and had some space to expand a bit, as well as to keep all my hops in one location now that I have my own yard.  I am hoping to do a few hop yard updates throughout the season. 

This slideshow requires JavaScript.

Last year I started six plants – two rhizomes each of Cascade, Centennial, and Glacier.  The Cascades and Centennials did very well growing on my father-in-law’s chain link fence (ended up with about five ounces wet hops, most of which came from one of my cascades).  I grew the Glaciers at my old apartment in a spot that was probably a little too shady, but the plants still did pretty well until one of them was stripped of most of its leaves (probably a deer) half-way through the growing season.  Fortunately, the plant bounced back enough to survive the winter and is coming up this year, although not as strong as the rest of the second-year plants.

Now that I have a yard of my own, I have all six plants from last year strung up to my fence, and have space for four new plants – two rhizomes each of Columbus and Chinook, bringing my totals up to five varieties and ten plants – a pretty respectable hop yard in the making.  So far, the growing season in the Philly area is off to a great start.  My stronger second-year hops already have multiple bines that have climbed up to the top strand that runs along the top of my six-foot tall fence.  My first-year plants are also doing strong – after being planted for just under a month all of them have at least one bine popping up, with the strongest having about four bines coming up.

A few notes on my set up for stringing up the hops:

  • All of my hops are being grown in planters.  The idea is that it will be easier to move the hops if they don’t work well in the spots they’re in.  If they work out where they are, I will probably put them directly in the ground next year.
  • I am stringing up my hops in a ‘W’ formation with one strand going straight up and two going diagonally up to a single top strand going horizontally, about 5.5 feet off the ground.
  • I use twine for stringing up my hops.  I have heard some people say they end up going to something thicker or stronger, but I think the twine should do the trick at least through this year.  In future years, if the load of the bines gets too much, I may switch to a stronger material.
  • My plants are spaced about 8 feet apart if they are the same variety, and about 16 feet if they are different varieties.
  • I did not trim out any of the bines this year.  I have heard of people trimming them down so there are only 3 – 4 bines per strand so that the plant focuses on the hop cones instead of the plant foliage.  However, since it is only the second year for my oldest plants, I will focus on the plant structure again this year, rather than the yield, and string up all of the bines that come up.  Next year, depending on what kind of yield I get this year, I may start limiting the number of bines on the older plants to get more hop cones.

I am hoping to do a couple more updates on my hop yard later in the season.  Hopefully, the next update will come when I have hop cones coming on the bines.  Until next time, cheers!

Song of the Day: “Scott Farcas Takes it on the Chin” by Less Than Jake

Beer of the Day: Bells Oberon

First Batch of Jerky and a Delayed/Modifed Brew Day

I tend to be a little too ambitious when trying to schedule out my free time (read as, “I bite off more than I can chew”).  My main goals for this past weekend were to smoke some beef jerky to break in my new smoker, and to brew a five gallon all-grain batch of a Pale Ale to break in my new outdoor brewing setup.  The smoker day went off great and I ended up with a pound or so of two different types of pretty tasty jerky – not perfect, but that’s not what I was going for (what’s the fun if you don’t learn anything?).  The brew day … well, it ended up not even happening on Sunday and ended up getting substituted for a smaller, brew-in-a-bag brew day on Monday night. 

This slideshow requires JavaScript.

Jerky

I was able to marinate both types of jerky overnight, as planned.  One pound got the steak sauce marinade, the other pound go a fairly traditional Cajun rub that was a bit heavier on the brown sugar.  In the end, I ended up smoking the jerky (with charcoal as a base and soaked hickory chunks on top for smoke flavoring) for about four or so hours.  Overall, both versions came out very tasty, although the Cajun probably edged out the steak sauce version as a favorite.  We had a barbecue on Sunday with a few people and I had both versions out – the Cajun version got pretty well massacred, which I take as a pretty good compliment.  However, I definitely learned a lot about my smoker, and making jerky in general, and plan on making a few improvements on the next go-around:

  • I started with a heaping charcoal chimney of charcoal, as well as a healthy of water-soaked hickory chunks, when I started up the smoker.  The smoker’s manual suggested 10-15 pounds of charcoal to start, which seemed very high to me, so I decided to go with about the same amount (probably a little more) than I would use in my Weber charcoal kettle grill if I’m cooking a lot of food for an hour or so.  It ended up driving the temp on the smoker a bit higher than I wanted – it went up to around 300F*.  I decided to go with it anyway, and let it free fall back down, which it did.  I ended up needing to add another partial chimney towards the end to keep the temp up closer to 200F*, as well as some more hickory (mainly for flavor, not heat).  Next time, I plan to dial back the starting amount to maybe three-quarters of a chimney, and lighting up more to add, as needed.  I would rather have to add coals once or twice more during the cook to get that nice slow-and-low cooking process.
  • When I got the meat this time, I ended up getting a little over two pounds of london broil and having the butcher cut it for me.  Next time, I plan on either using a thicker top round roast, or cutting at an angle to get a wider swatch of meat.  This batch came out more like sticks – which tasted great, but I tend to prefer a little wider strip to bite into.
  • Next time I will try to aim for more chewiness.  This batch came out great, but it probably could have used a little less time in the smoker.  I think the initial hot start, sped up the cooking process a bit more than I like, especially with the narrower cut.  Now, I have a little better grasp on what to look for in the jerky as it cooks.

*A note on smoker temp.  If you have a backyard smoker, I do recommend getting a reliable oven thermometer to use with your smoker.  Most smokers come with built-in thermometers.  A lot of these thermometers are not very specific (mine has three zones – warm, ideal, and hot) or accurate.  Pick up an inexpensive, but reliable dial oven thermometer.

Tire Kicker Pale Ale – The Express Version

I thought it would be a great idea to do an all-grain brew day on the same day as having a few people over for an afternoon/evening barbecue.  And, to be fair, it probably would have been a great idea, had everything gone smoothly.  Afterall, the brewing and barbecuing space is the same – the back patio.  Not to mention the gorgeous weather the Philly area saw on Sunday.  Too bad I couldn’t get my new burner to work right. 

Don’t get me wrong – the blame mostly lies with me for not testing the burner out thoroughly enough ahead of time.  My idea of testing out the burner was to hook it up to a tank on Sunday and make sure I could light it.  What I did not do is make sure I could get a low, blue flame.  Come Sunday morning, I was having all sorts of trouble heating my strike water because I was getting a ridiculously tall, yellow flame and it kept lighting at the damper where the air and propane mix.  Not good.  After messing with it for a couple of hours and getting very frustrated (remember, it had been three months since I brewed), I finally bagged the brew day and shifted gears to getting ready for people to come over.  After talking over the issue with my buddy and my father-in-law at the BBQ, the consensus was that the burner probably had something obstructing the flow of gas and air coming into the vents causing it to not get hot enough, and to light by the damper. 

Sure enough, after getting in there with a little wire on Monday night after work, I hooked up the tank again, lit it, and bingo – much more reasonable, blue flame.  Must have been a little gunk or debris blocking the gas flow.  Now that I was back in business, it was time to brew.  I didn’t exactly have time to brew a full five gallon all-grain batch on a weeknight (“ain’t nobody got time for that”), and didn’t really feel like waiting until the weekend for the batch, which would set me back even further. So, cut the recipe in half, put the grain in the trusty ol’ mesh bag, and rock it brew-in-a-bag style.  Still a great way to try out the new burner and kettle, and a good way to do a true BIAB brew day for the first time (I have done BIAB before to great success, but have always had to do a sparge with it because my biggest kettle was a five-gallon and I was brewing on an electric range).  Same as the smoker break-in session, there were lessons to be had:

  • My OG came out a little low (1.053) compared to the recipe calculations (1.061).  Next time I do BIAB, I will probably over-compensate with a little extra base malt since I don’t have a mill of my own yet to dial it down to a finer crush.
  • I definitely got a larger amount of boil loss and equipment loss than I anticipated.  I ended up with about 2.25 gallons after adding in the yeast starter.  The burner (once it was working right) was a work horse and the kettle had a little wider surface area than my old kettle so I ended up getting a larger boil off than I am used to, as well as more trub left in the kettle (not really a bad thing) at the end thanks to my bazooka screen inside my kettle.  Next time, I will have to up the starting boil volume.

Overall, the beer should still come out damn tasty and is bubbling away in the carboy now.  One of the main reasons I went with APA as a style for the first brew was that if I missed the OG in either direction, I would still have a very drinkable beer.  I should end up with a hoppy 5-ish% pale. 

All in all, the brew day served its purpose – I have beer in the carboy and I learned some lessons on the new equipment.  Can’t wait to brew again and taste the pale ale when it gets the dry hops this weekend.  I think I can now say that I am back in the damn saddle. 

Tire Kicker Pale Ale (A Very Quick Game-Time Shift to BIAB)

Recipe specifics:

Style: American Pale Ale
Batch size: 2.5 gal
Boil volume: 3.5 gal
OG: 1.061
FG: 1.015
Bitterness (IBU): 42.2
Color (SRM): 6.0
ABV: 6.0%

Grain/Sugars:

5.00 lb Two-row (US), 90.9%
0.50 lb Crystal 20L, 9.1%

Hops:

0.50 oz Cascade (AA 6.6%, Whole) 60 min, 21.8 IBU
0.50 oz Cascade (AA 6.6%, Whole) 15 min, 10.8 IBU
1.00 oz Cascade (AA 6.6%, Pellet) 5 min, 9.6 IBU
1.00 oz Simcoe (AA 12.2%, Pellet) 0 min, 0.0 IBU
1.00 oz Centennial (AA 9.0%, Pellet) dry hop

Yeast/Misc:

California Ale yeast, 1.0 unit(s), Yeast
Irish Moss, 1.0 unit(s), Fining 1 tsp at 15 min

Song of the Day: “Somewhere in the Between” by Toh Kay

Beer of the Day: Iron Hill (Media)/Ithaca collaboration Dark Humor Rising aged in Sherry Barrels

Prep Day: Breaking in a New BBQ Pad

New patio poured on the back of the new house?  Check.  New fence up?  Check.  Hops set up and strung up?  Check.  Sounds like I have all the fix’n’s for a new brewing and barbequing space. 

A view of a few of my hop plants (these ones are Glacier and Centennial). I'll do a few updates throughout this season on my hop yard).

A view of a few of my hop plants (these ones are Glacier and Centennial). I’ll do a few updates throughout this season on my hop yard).

Lots of breaking in to do this weekend.  FIrst time using the new patio extensively.  First time firing up my new smoker.  FIrst time brewing on my new propane burner and 9 gallon kettle.  First time brewing at all since February 3rd.  Yes, it is appropriate to envision me giggling in anticipation.  Fortunately, the weather in the Philly area is supposed to be pretty much money this weekend, so game on.

My original inclination was to brew and smoke in the same day.  Then I envisioned a lot of stress and rushing around multitasking while trying to learn a few new pieces of equipment at the same time.  Don’t get ahead of yourself John, there will be plenty of time to multitask once your comfortable with the new gear. 

As a result, I’ll be christening the new smoker with a couple pounds of beef jerky (done two ways) on Saturday, and breaking in the new brewing gear with a 5 gallon all-grain batch of a pretty straightforward APA.  Enter prep day.

Whenever possible, it always seems like a good idea to do as much prep work in advance as you can.  It makes cooking and brewing much more enjoyable.  Today was very definitely a prep day – 1L WLP-001 starter, buy a propane tank, strip down and deep-clean the mash tun that hasn’t been used in a long ass time, marinate jerky, clean and prep the smoker.  Busy day.  Totally worth it to be able to get going right off the bat tomorrow.  The plan is to continue that prepatory philosophy tomorrow by giving the brewing rig a good PBW soak once I get the smoker temperature dialed in good.  It is all about making the actual brew/cook day a lot more enjoyable by taking away as much stress as possible from a hectic schedule.

Beef Jerky, Two Ways

I’ve never made jerky before, but I figure that would be a good way to break in my new smoker.  Since it’s my first time, I decided I would try out a couple different flavors and styles to see what works for me, and what doesn’t.  The first is based off of the jerky recipe in the Stone Brewery Book (which, on a side note, is an awesome book, and you should buy it … like, now), which uses a steak sauce recipe in the same book. Their’s calls for using Oak Aged Arrogant Bastard, which I substituted Southern Tier Live, because I had it on hand and thought the flavor would go well. 

For the other jerky variety, I chose to go with a pretty straightforward Cajun dry rub, but a little heavier on brown sugar.  Both versions got a pound of 1/4 inch sliced top round steak and were marinated over night.  From what I can gather, it will probably take me 4-6 hours to smoke the jerky around 200F until it is dried out enough. 

 Tire Kicker Pale Ale

Sunday will be the time to shake out the cobwebs and fire up the new burner and kettle.  Prior to moving into our new house, I was confined to a tiny kitchen with an electric range for brewing, so, needless to say, I am very excited to have an outdoor brewing setup.  To see how the new system works out and how efficient it is, I figured a great place to start would be a straightforward APA – something I am comfortable with and know what it should come out like – a control, if you will.  An APA also fills my need for a sessionable beer to restock my homebrew supply.  My stockpile is looking mighty heavy on barley wines, strong belgians, meads, and ciders. 

Needless to say, I am very amped to get back in the saddle and brew again, so all in all, this weekend is slated to dull the homebrew itch pretty good.  Get out there and enjoy the weekend!  Cheers!

Tire Kicker Pale Ale

Recipe specifics:

Style: American Pale Ale
Batch size: 5.2 gal
Boil volume: 6.2 gal
OG: 1.058
FG: 1.014
Bitterness (IBU): 40.5
Color (SRM): 5.8
ABV: 5.7%

Grain/Sugars:

10.00 lb Two-row (US), 90.9%
1.00 lb Crystal 20L, 9.1%

Hops:

0.50 oz Columbus (AA 15.4%, Whole) 60 min, 23.1 IBU
0.50 oz Columbus (AA 15.4%, Whole) 15 min, 11.5 IBU
1.00 oz Centennial (AA 9.0%, Pellet) 5 min, 6.0 IBU
1.00 oz Centennial (AA 9.0%, Pellet) 0 min, 0.0 IBU
1.00 oz Centennial (AA 9.0%, Pellet) dry hop

Yeast/Misc:

California Ale yeast, 1.0 unit(s), Yeast
Irish Moss, 1.0 unit(s), Fining 1 tsp at 15 min

Song of the Day: “Oh Me, Oh My” by Streetlight Manifesto

Beer of the Day: Southern Tier Live

Reboot, Rebrand, Rebuild

This slideshow requires JavaScript.

I’ve had a blog for a bit now over here, but decided it was a good time to take a step back and re-focus on what I really wanted to make my blog about (read as, what people beyond the people I know personally would find interesting) – and that is homemade fermentables – particularly beer.  Now, this blog will still have periodic side tracks that delve into other aspects of my life, but the primary focus will be my homebrewing activities. 


This blog is intended to be a more brew-centric, shorter form version of my previous blog (not that I won’t have longer posts when warranted, but they won’t be quite as unnecessarily long-winded as my last blog was at times).  This will hopefully allow me to post more frequently and with a wider range of beer-related posts, including the occassionally beer review or tasting notes.  I’m also hoping to mix in the occasional post about one of my other passions – cooking, particularly of the outdoor, charcoal and smoked variety.


I recently took a hiatus from my previous blog, largely because non-internet-based life tends to have a way of consuming a lot of your time – particularly when you are looking for a house.  Well, I’m happy to say that we found a house, and have moved into the new place, are making it our own.  Now that things are settling down a little bit, I figured now was a good time to start with a reboot of my internet homebrewing presence. 


I’m very excited when I look forward to the new possibilities that the new house entails, including a new outdoor, all-grain brewing setup (I’m finally, not confined to a electric stove top in a tiny apartment kitchen), more fermentation space (I see a few sours in my future, finally), a kitchen that will be a lot easier to cook in, more space to grill, and a new smoker to play with (probably breaking it in by trying my hand at jerky this weekend).  I hope to share many adventures with you in the very near future!  Until next time, cheers!


Song of the Day: “In Due Time” by Killswitch Engage

Beer of the Day: Oscar Blues Ten Fidy